Key Takeaways:
- Power washing is an excellent way to clean your residential property.
- The method delivers exemplary results and ensures your property is clean and spot-free in no time.
- There is debate surrounding the right season for power washing.
- Regardless of the season, you should call power washing professionals if you choose to power wash your home.
- Elite Custom Painting and Remodeling offers exemplary power washing services that can revamp your exterior.
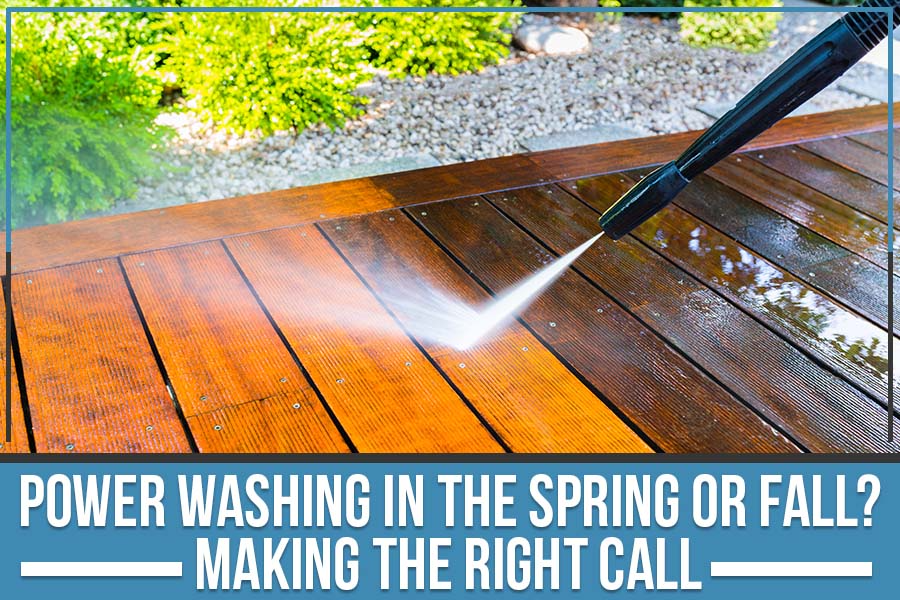
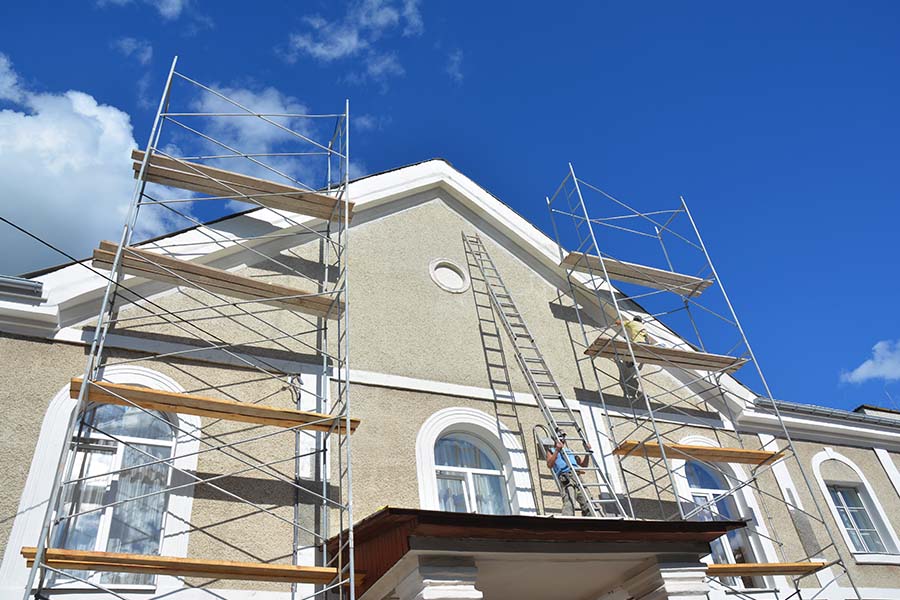
It’s that time of year again when homeowners have to indulge in home maintenance. Should you get the windows replaced before winter sets in, or wait until spring? Should you seal the driveway before the snow falls or put it off until the weather cooperates? One question that’s often debated is when to power wash your house: in the spring, when all the pollen and freshly fallen leaves are gunking up your siding, or in the fall, after months of baking in the sun and rain? So, which is it – should you power wash your home this spring or fall? Let’s take a look at both options.
Benefits of Power Washing
Power washing may seem tedious and time-consuming, but it’s one of the quickest and easiest ways to give your home a much-needed facelift. Not to mention, it’s also an affordable method of boosting your home’s curb appeal. So, if you’re looking for a quick and easy way to spruce up your home this spring, power washing is the way to go!
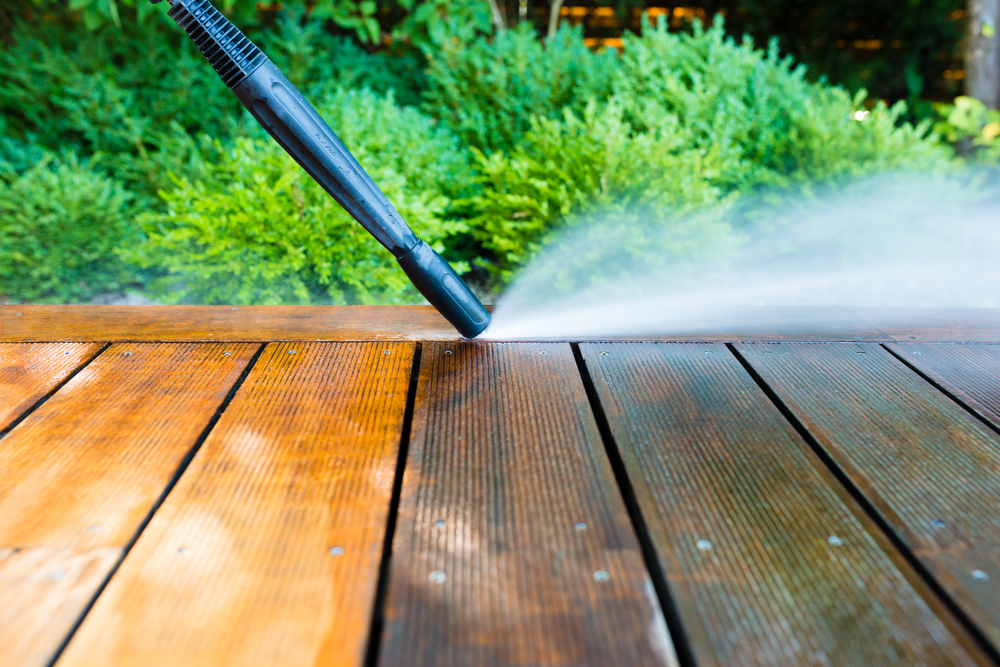
In addition to being quick and easy, power washing has several other benefits that make it well worth the effort. It removes all the dirt, grime, and pollen that built up on your home over the winter months. Not only does this make your home look cleaner, but it also helps protect your siding from damage caused by these elements.
Power washing removes any mold or mildew that may have developed on your siding or deck over the winter. This is important because mold and mildew can cause severe damage to your home if left untreated. You can prevent further damage by power washing these areas of your home.
Finally, power washing is the first step to painting or staining your home this spring. This is because power washing removes any loose paint or stains on your siding, giving the new paint or stain a clean surface to adhere to.
Also, Read – Signs Your Home Structure’s Compromised
5 Reasons You Should Power Wash During Fall
Power washing your home in the fall is an essential part of home maintenance that many overlook. Here are five reasons why you should power wash your home in the fall:
- Debris can accumulate in gutters during spring and summer, clogging them and causing damage to your sidings. You can remove all that debris by power washing in the fall and keep your gutters clear and your sidings looking good.
- Clogged gutters can cause water to back up and seep under your shingles, leading to leaks and water damage. Thorough power washing will remove debris obstructing your gutters and keep them clear all winter.
- The leaves, pollen, and other debris accumulating on your siding during spring and summer can leave behind stubborn stains. A power wash in the fall will remove those stains and make your siding look new.
- Fall provides an ideal temperature for power washing. Not too hot, not too cold – just perfect for getting rid of all that unwanted dirt and grime.
Why Should You Power Wash during Summer or Spring?
Your home could do with some TLC during the summer season. Here’s why power washing makes sense during the spring or summer season.
- Get Rid of All that Winter Grime – We all know how gross winter can be. Your house is constantly covered in grime between the snow, slush, and salt. A good power washing will eliminate all that winter gunk and leave your home looking shiny and new again.
- Give Your Home a Pick-Me-Up – Let’s face it, after being cooped up indoors for months, your home could use a little pick-me-up. Power washing is the perfect way to give your place a fresh start for the summer.
- Preventative Maintenance – Not only does power washing make your home look great, but it also helps to prolong the life of your siding, deck, and other exterior features. By giving them a good cleaning now, you’ll be able to enjoy them for years to come.
The Perils of Power Washing Your Home Yourself
Before you break out the garden hose and pressure washer, you might think twice about DIY power washing your home. While power washing your home might seem like a good idea, there are quite a few risks involved. Here are just a few of the dangers associated with DIY power washing your home:
1. You could damage your property.
Pressure washing your home is not as simple as pointing the nozzle at your siding and pulling the trigger. If you’re not careful, you could damage your siding, break windows, or worse. That’s why it’s always best to leave this work to the professionals.
2. You could injure yourself – or someone else.
Power washers are mighty machines. If you’re not careful, you could easily injure yourself – or someone else – with the high-pressure stream of water. Again, this is best left to those who know what they’re doing.
3. You might not get the results you were hoping for.
Even if you manage to avoid damaging your property or injuring yourself, there’s no guarantee that you’ll be happy with the results of your DIY power washing job. Chances are that you’ll be disappointed with your home’s appearance after you’ve finished power washing it yourself. Why take the risk when you can hire a professional who guarantees your satisfaction with the results?
If you’re still on the fence about power-washing your home in the spring or fall, remember that Elite Custom Painting and Remodeling will help no matter what season you choose. We’ll ensure your house is clean from top to bottom and do it at an unbeatable price. Please request a free estimate today and see why we’re Great Falls’ premier power washing company.
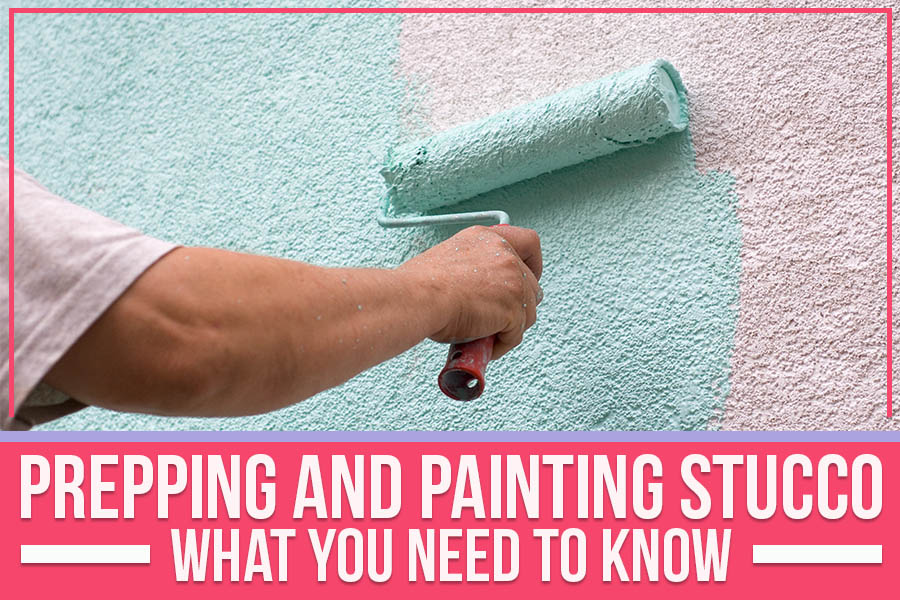
Prepping And Painting Stucco: What You Need To Know
Key Takeaways –
- Stucco painting is complicated and is not always the first thing homeowners have in mind during a home painting and remodeling project.
- However, a stucco siding can tie your place together, adding a welcoming vibe.
- The texture, the porosity, and the color challenges are some reasons why painting stucco can be challenging.
- You should remember the dos and don’ts of stucco painting during the home painting and remodeling project.
- Trust only professionals for the job; stucco painting is not for amateurs.
- Elite Custom Painting and Remodeling offers exemplary home painting services, including coloring your stucco.
Like most property owners, prepping and painting stucco probably makes you uncomfortable. It’s a difficult job, and if you don’t do it right, you’ll end up with a botched paint job that will last for years. But don’t worry – we’re here to help! This blog post will discuss details you must remember before prepping and painting your stucco. We’ll cover the tools you need, the prep work involved, and how to avoid common mistakes. So read on – your stucco is counting on you!
Why is Painting Stucco Challenging
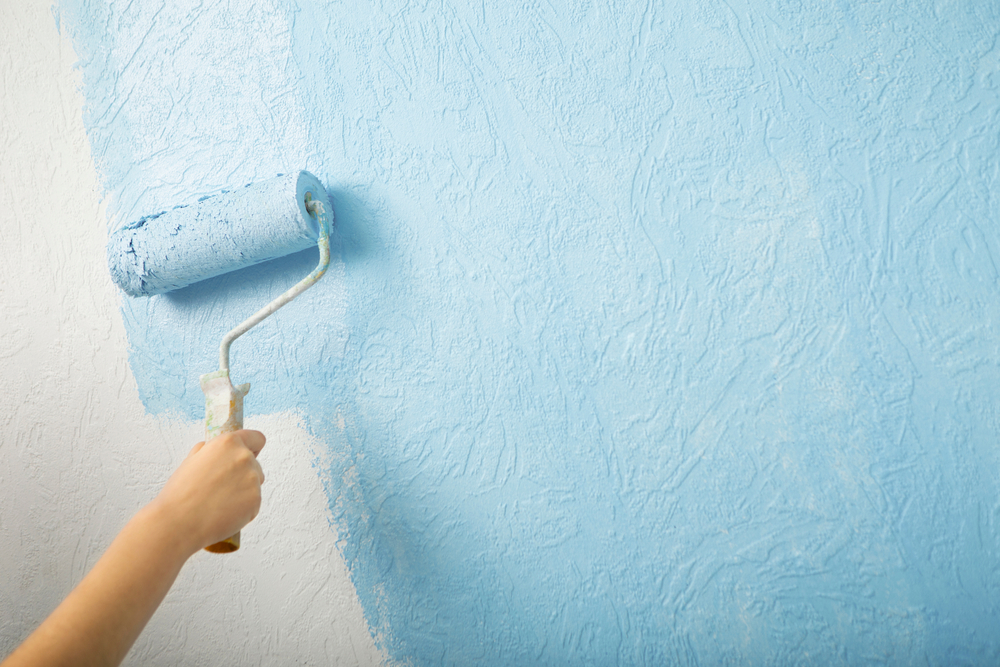
One of the biggest challenges when painting stucco is its texture. This rough surface can be tough to work with and often results in an uneven paint job. One way to counter the complex texture is by using a high-quality primer specifically designed for rough surfaces. This will help smooth the texture and provide a more conducive surface for the paint to adhere to.
Porosity is another challenge when painting stucco. This means that the material is highly absorbent, which can lead to problems with paint adhesion. To combat this, you’ll need to use a primer that contains an acrylic resin. This will help to create a barrier between the paint and the stucco, allowing for better adhesion and longer-lasting results.
Finally, one of the most frustrating challenges when painting stucco is its color. Because this material is so absorbent, it can be challenging to achieve consistent color coverage. To combat this problem, you’ll need to use several coats of paint and allow each coat to dry thoroughly before applying the next. Patience is critical when painting stucco!
Also, Read – Exploring EIFS For Stucco Home Exteriors!
Why Cleaning the Surface is Essential?
Before you start painting stucco, it’s essential to clean the surface first. This will ensure that the new paint adheres properly and doesn’t peel off later down the road. Here are some reasons why cleaning the surface is necessary before stucco painting.
First, cleaning the surface before painting is important because it allows the paint to adhere better to the surface. The paint will have difficulty sticking if dirt, dust, or grime is on the surface. This can lead to several problems, including flaking, chipping, and peeling paint. Not only is this unsightly, but it will also require more frequent repainting – something no one wants to deal with.
Additionally, if there’s dirt, dust, or pollen on the surface that you’re about to paint, you could end up inhaling it. This could lead to respiratory problems or other health issues. So it’s essential to clean the surface for the sake of the paint job but also for your health and well-being.
There are a few different ways you can clean stucco before painting. One way is to use a power washer with mild detergent. Another option is to use a garden hose with a high-pressure nozzle attachment. If you go this route, ensure you hold the nozzle at least six inches away from the stucco surface while cleansing it.
It would help if you also considered renting or purchasing a steamer to clean surfaces like stucco. A steamer will help remove stubborn dirt or grime clinging to your stucco. Whichever method you choose, thoroughly clean the surface before painting!
You’ll need a power washer and a wire brush attachment. Start by wetting down the surface with the power washer. Once it’s wet, attach the wire brush attachment and scrub away at any dirt, grime, or stains that are present. Get into the nooks and crannies – you don’t want anything left behind! Once you’re finished scrubbing, use the power washer again to rinse away any debris that’s been loosened up. Allow the surface to dry thoroughly before moving on to painting.
Dealing with Problems
Cleaning the stucco before painting allows you to spot potential problems. This could be cracks on the surface of the stucco or areas where the paint is peeling. It’s essential to repair any damage before painting because otherwise, it will just show through after you’ve painted.
If there are cracks in the stucco, use caulk to fill them in and smooth them out. You may need to use mesh tape and caulk for larger cracks. Once you fill the cracks, use sandpaper to smooth the surface, so it’s level with the rest of the stucco.
If there are areas where the paint is peeling, scrape off any loose paint and then sand down the site until it’s smooth. Again, this will help create a level surface for painting.
Why Preparation is Key
Stucco is a type of plaster that’s made from sand, water, and cement. It’s a very popular material for exterior walls because it’s durable and low maintenance. However, stucco requires special care when it comes time to paint. The key to a good paint job on stucco is all in preparation.
If your preparation is insufficient, the paint will not adhere correctly and will start to chip and peel within a few years. In extreme cases, painting over an unclean surface can ruin the stucco.
Once you’ve pressure-washed your stucco surface and allowed it to dry completely, it’s time to start painting. When choosing a paint for your stucco project, be sure to select a high-quality exterior paint that is specifically designed for use on masonry surfaces. Don’t skimp on quality here—a cheap paint job will only last a few years, whereas a high-quality paint job will last much longer. Plus, it’ll look better in the meantime!
Now that you know all there is to know about prepping and painting stucco, it’s time to bring in the professionals. At Elite Custom Painting and Remodeling, we can help turn your vision into a reality in Dumfries. We offer free estimates, so contact us today and let us show you what we can do.
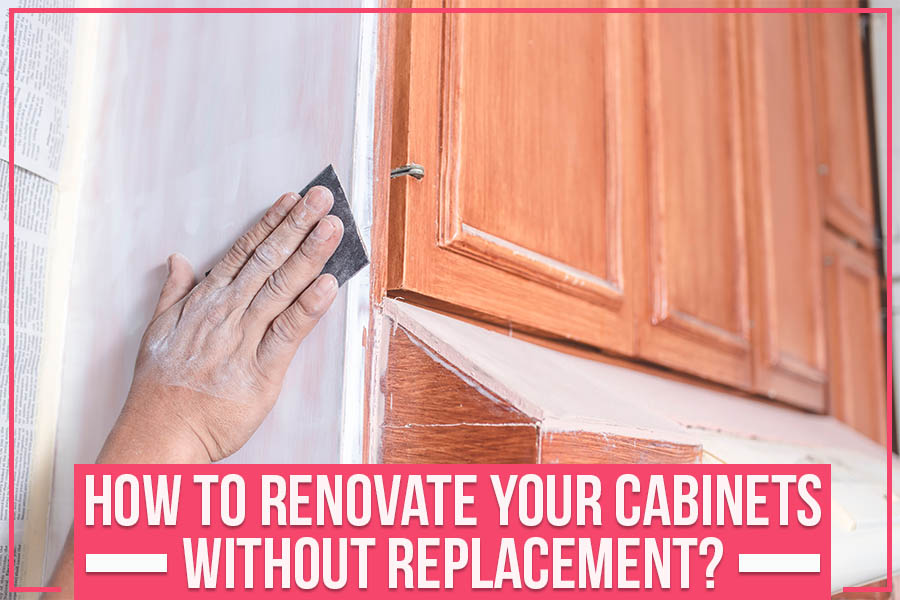
How To Renovate Your Cabinets Without Replacement?
Key Takeaways
- Several alternatives to replacing your cabinets can save you time and money.
- You can repaint them, refinish them, or add new hardware to give them an updated look.
- If you’re looking for a dramatic change, you can replace the doors or reface the cabinets.
- Hiring a professional to install your cabinets is the best way to ensure peace of mind and a high-quality product.
- Replacing your cabinets may be the best option if they are damaged beyond repair or if you’re looking for a complete kitchen makeover.
Cabinets are a key part of any home. Not only do they provide valuable storage space, but they also contribute to the overall aesthetic of the room. Unfortunately, cabinets can be prone to wear and tear over time.
You might have the idea of replacing them, but might be against spending money on new ones. If you’re stuck deciding whether to get new cabinets or look at the old ones, don’t worry!
Elite Custom Painting and Remodeling offers some helpful tips for cabinet renovation. We also will discuss whether DIY is the way to go or whether hiring a professional would be best for installing or refinishing cabinets.
5 Unique Cabinet Renovation Ideas
1. Cabinet Refacing
If your cabinets are in decent shape, but you’re just tired of the way they look, then refacing might be the option for you! This process involves adding a new thin layer of wood veneer over the existing surfaces of your cabinet doors and drawer fronts.
Cabinet refacing is a reasonably straightforward process, and with a little effort, you can DIY. The end result gives you the kind of cabinets that look fresh out of a magazine!
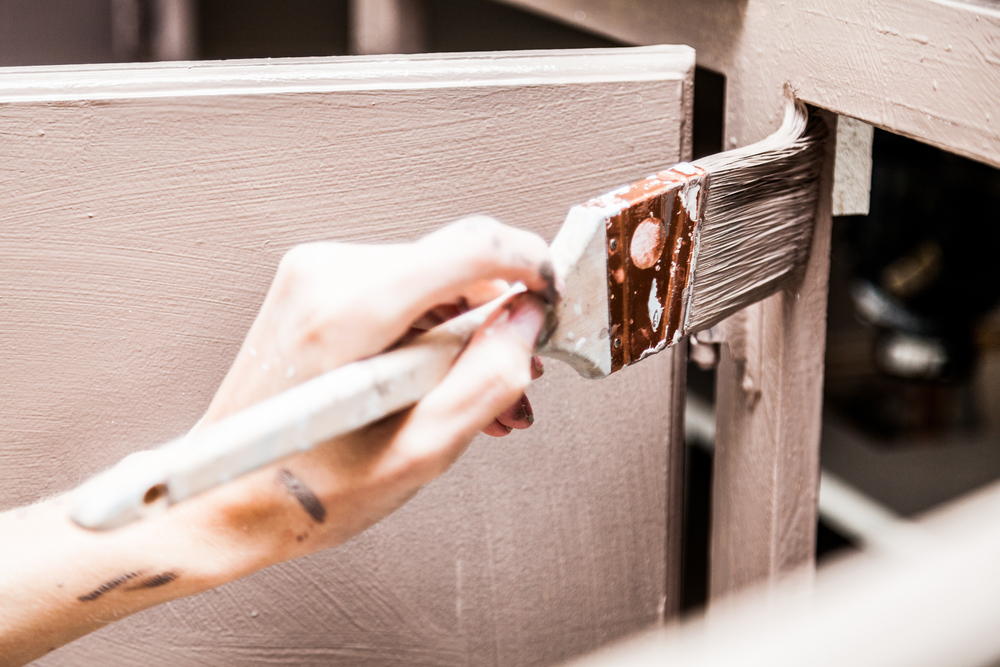
2. Cabinet Painting
Painting your cabinets is another great way to give them a fresh, new look without spending much money. You can either paint them yourself or hire a professional painter to do the job for you.
Besides that, painting can also protect your cabinets from moisture and other elements that can damage them over time.
When painting your cabinets, be sure to use high-quality emulsions & primers specifically designed for painting wood surfaces. It will ensure that the paint job lasts for years to come.
3. Cabinet Hardware
Among the easiest & quickest ways to change the look of your cabinets is by changing the hardware. It could involve replacing the knobs and pulls to adding new hinges. You could also personalize them by painting the hardware in a color that coordinates with the rest of your kitchen.
With personalization, the possibilities are limitless; make sure the new hardware is installed correctly to avoid damage to your cabinets.
4. Create Open Shelving
If you have cabinets that are too tall to reach, consider removing the doors and creating open shelving. It will give your kitchen an airier feel and make it easier to access everything inside the cabinets.
Open-styled cabinets have the added benefit of exuding elegance if they have been spaced optimally for easy reach for users.
5. Glass Cabinet Doors
Another way to spice up the look of your cabinets is by adding glass doors. It will give them a more elegant and sophisticated look. These doors also have the added benefit of making your kitchen look more spacious and open.
If you’re worried about the glass getting dirty, you can always opt for frosted or stained glass, which will hide fingerprints and smudges.
Benefits of Hiring a Professional Than DIY
Although you can take the time to DIY your cabinet renovation, hiring a professional for cabinet design would prove a better option. Here’s why:
1. Better Ideas
Although you may have countless ideas, they can go to waste without the proper skills. A professional will be able to not only bring your ideas to life but also improve them.
They will have better suggestions for materials and methods you may not have even considered. They can even give you a thousand-dollar design on a pocket-friendly budget!
2. Experience
You might have invested your time in cabinet renovation, but a professional will have years of experience. This experience will make them work faster and more efficiently. They will make fewer mistakes, saving you time, money, and frustration in the long run.
3. Quality Materials
To achieve a high-quality renovation, you need to use high-quality materials. These materials can be expensive and hard to find if you don’t know where to look.
A professional can get their hands on the best materials for your project, so you don’t have to settle for anything less than perfect.
4. Give Better Planning
With years of experience, professionals are more accustomed to working according to the set schedule. They will know how to better utilize their time and resources to complete the job as quickly and efficiently as possible.
5. Peace of Mind
While DIY may be cost-effective, you won’t visualize the same outcomes.
Hiring a professional gives you peace of mind.
You can relax knowing that your cabinets are in good hands and that the final product will be exactly what you want.
Also Read: Kitchen Remodeling Trends That Will Never Go Out Of Style
Bottom Line
Although you can have some benefits from cabinet renovation, the better option to consider is cabinet replacement.
It will save you time and resources in the long run, and you can be sure that the paint job will be done right the first time.
Cabinet replacement may cost more initially, but it is definitely worth the investment. With professionals on the job, you can be sure that your money is well spent & that the end result pleases the eye.
So, if you’re thinking about renovating your cabinets, think again! Cabinet replacement is the way to go.
Professional Cabinet Designers and Installers in Woodbridge, VA
Need cabinet refinishing or want better cabinet designs? In that case, you should consider Elite Custom Painting and Remodeling, serving Woodbridge, VA. Our team of experts can help you create the perfect custom-made cabinets for your home.
Get in touch with us now to get a free estimate.
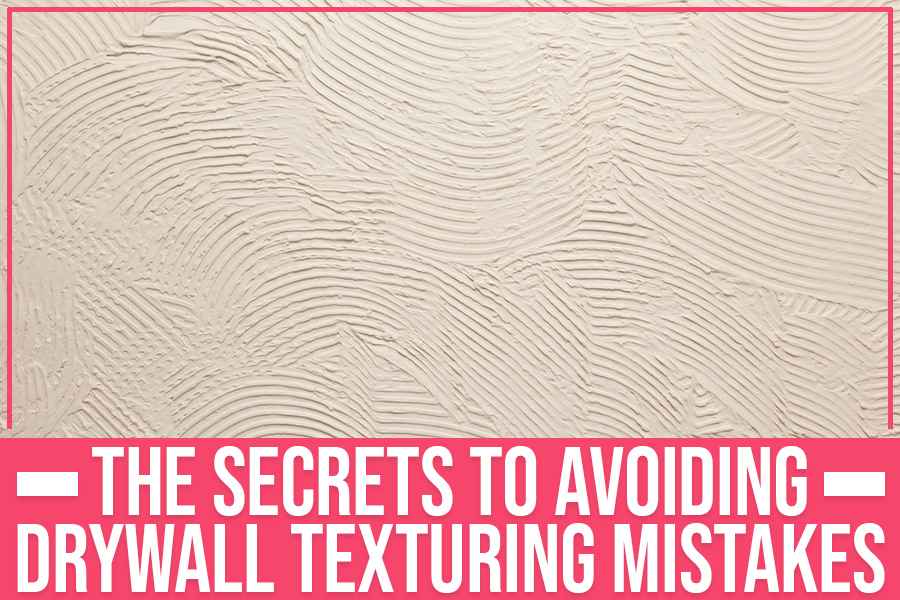
The Secrets To Avoiding Drywall Texturing Mistakes
Key Takeaways –
- DIY drywall texturing is challenging.
- You must learn the technique and apply it carefully to avoid ruining the drywall.
- Professional texturing always stands out from DIY efforts.
- Choose professional contractors wisely before assigning them responsibility.
Drywall texturing might seem simple, but if you’re not careful, you can easily make some mistakes that will leave your walls looking terrible. This blog lists common texturing mistakes and explains how not hiring a professional is the biggest mistake.
Five Most Common Drywall Texturing Mistakes
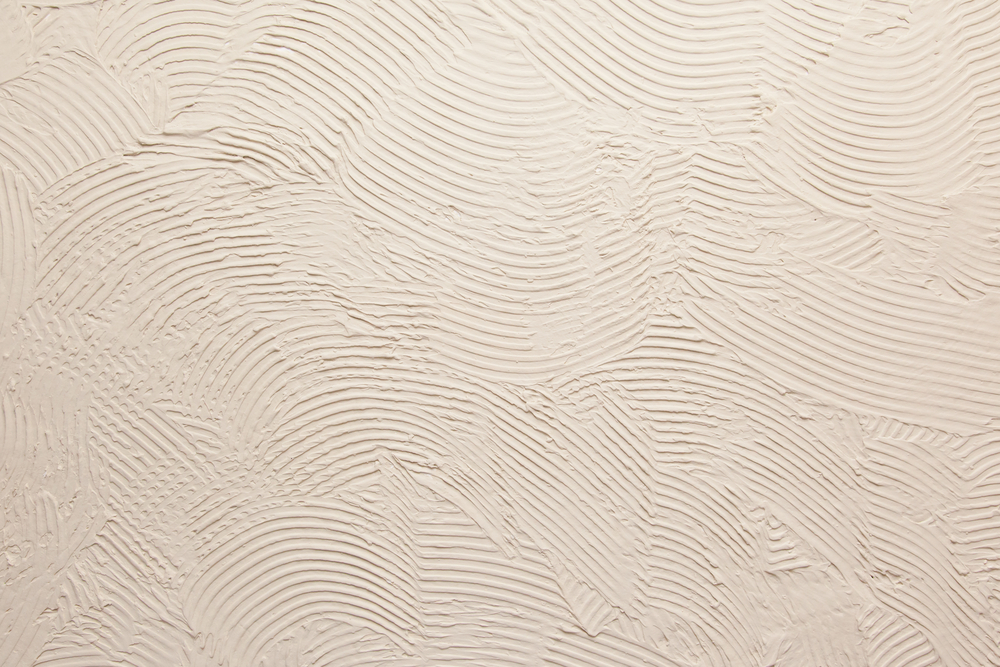
At best, drywall texturing can add visual interest and dimension to a room. At its worst… well, we’ve all seen some genuinely terrible texturing jobs out there. If you’re considering adding wall or ceilings texture, avoid these five common mistakes:
1. Not Using the Right Tool for the Job
Professionals use different tools to apply texture to drywall, including hand-held brushes, rollers, combs, and even spray bottles. However, not all tools are created equal. Different tools produce different effects, so choosing the right tool for the job is essential. For example, if you want a stippled effect, using a roller will give you better results than using a brush.
2. Not Learning the Techniques
Choosing the right tool for the job doesn’t mean you’ll automatically know how to use it. Learning how to apply texture properly takes practice and patience. Fortunately, various resources are available to help master the techniques, including YouTube videos, online tutorials, and books on the subject. Practice on scraps of drywall or in an inconspicuous corner of the room before tackling the entire project.
3. Applying Texture Unevenly
Once you’ve mastered the techniques, it’s essential to apply the texture evenly across the surface of the drywall. Otherwise, you’ll end up with patchy areas that stand out like a sore thumb. To avoid this problem, start in one corner of the room and work your way around evenly and methodically. Be sure to check your work as you go along to catch any areas that you may have missed.
4. Letting Mud Dry Too Quickly
Applying texture mud is only half the battle – once it’s applied, you must dry it thoroughly before proceeding to the next step. If you try to rush things by skipping ahead too soon, your texturing job will suffer. Read (and re-read) the instructions to determine how long it needs to dry before proceeding. It will most likely need to dry overnight before sanding and priming.
5. Not Sanding Properly Before Painting
Texturing drywall aims to create a smooth surface that you can paint easily (and evenly). To achieve this goal, it’s essential to sand down any rough spots before painting – otherwise, your paint job will look terrible. The key here is to use fine-grit sandpaper so that you don’t damage the drywall surface. Use gentle strokes, and wipe away any residual dust before applying primer and paint.
Also, Read – Kitchen Remodeling Trends that Will Never Go Out of Style
Reasons Why Not Seeking Professional Help is the Biggest Drywall Texture Mistake
We’ve all been there. You’re watching HGTV, and they make DIY drywall texturing look so easy. “I can do that,” you think to yourself. “How hard could it be?” Fast forward a few hours (or days, depending on how big your project is), and you’re standing covered in a joint compound and regretting ever thinking this was a good idea. Here are a few reasons why DIY drywall texture is a big mistake.
1. You’ll Make a Mess
Working with a joint compound is messy, no matter how careful you are. However, that mess will grow exponentially when you try to do it yourself. Not only will you have joint compound everywhere, but also pieces of drywall falling on the floor and tools are strewn about. It’s just not worth the hassle.
2. It’s Harder Than It Looks
The texture might look easy when watching someone else do it on TV, but it’s pretty tricky. It takes immense skill and practice to get the right consistency for your texture and to apply it evenly across the wall. Unless you’re confident in your abilities (and we mean confident), it’s best to leave it to the professionals.
3. You Might Not Be Happy With The Results
Even if you do manage to apply the texture evenly (which is no small feat), you might not be happy with how it looks once it dries. If that happens, you’re stuck with it until you hire someone to fix it or until you replace the drywall entirely—neither of which are fun options.
4. You Could Damage Your Walls (Or Worse)
If things go wrong while texturing your drywall (and they often do), you could damage your walls beyond repair or injure yourself in the process—neither of which are fun options. Trust us; it’s just not worth the risk.
5. It’s Difficult to Fix Mistakes
Even if you’re careful while texturing your drywall, chances are good that you’ll make at least a few mistakes along the way. And unlike painting or wallpaper, those mistakes can be challenging—and sometimes impossible—to fix without starting from scratch.
What to Consider Before Hiring a Contractor for Adding Drywall Texture?
You’re about to embark on a journey. A journey to find the perfect contractor for your drywall texturing needs. Before entering the wide world of contractors, arm yourself with knowledge! You should consider four things before hiring a contractor for drywall texturing.
1. The Type of Texture You Want
There are many textures, and not all contractors specialize in them. Do some research beforehand and determine the specific texture type you want. This way, when interviewing contractors, you can ask them specific questions about their experience with that particular type of texture.
2. The Budget
Drywall texturing can get expensive, so it’s essential to have a budget in mind before you start interviewing contractors. That way, you can narrow your options to those who fall within your budget and avoid any unpleasant surprises later.
3. The Schedule
Another essential thing to consider is the schedule. When do you need the job to be done? Make sure to communicate this clearly to the contractor so they can give you an accurate estimate of how long the job will take.
4. The Warranty
Last but not least, don’t forget to ask about the warranty! Most reputable contractors will offer a warranty on their work, so make sure to find out what kind of coverage you would get before making your final decision.
Drywall texturing can add beauty and dimension to your Annandale home, but only if it’s done right. At Elite Custom Painting and Remodeling, we’ve been helping homeowners avoid drywall texturing mistakes for years. Following our simple tips, you can avoid common pitfalls that result in an uneven or sloppy finish. And if you’re ever unsure of how to proceed with your project, our team of experts is always just a phone call away in Annandale.
Request a free estimate today, and let us show you how easy it is to get the beautiful, functional space you deserve.
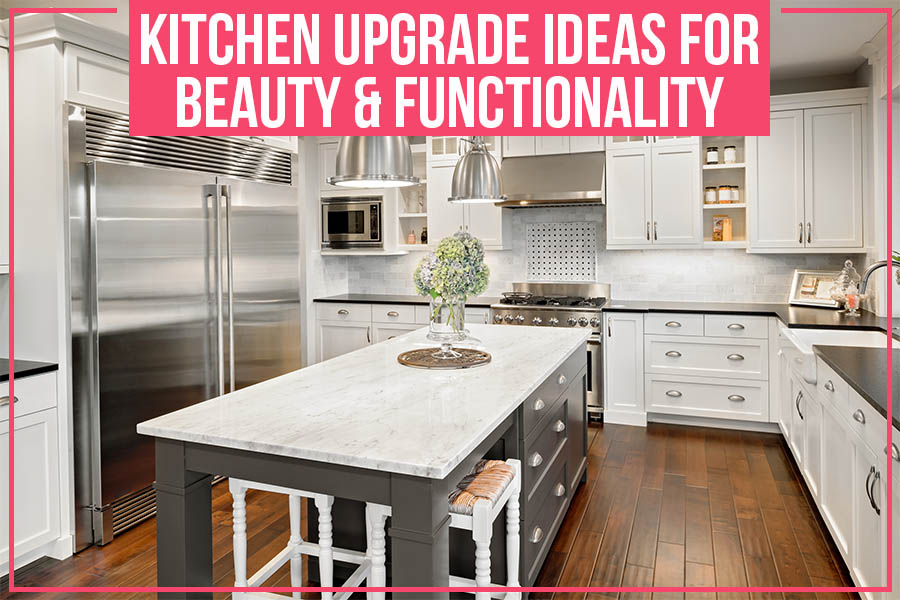
Kitchen Upgrade Ideas For Beauty & Functionality
Key Takeaways:
- Kitchen remodeling includes not only function but also design.
- Try incorporating some modern elements when upgrading your kitchen.
- A natural theme or woodsy feel can really warm up a kitchen space.
- If you have the budget, consider installing some top-of-the-line appliances.
- Smart technology can also be integrated into a kitchen for enhanced functionality.
What is your home without a kitchen? Not much. A kitchen isn’t only the place where you prepare your food, but it’s that corner of your home which brings everyone together. It’s not uncommon for homeowners to consider kitchen remodeling once they observe the paint chipping off and the appliances wearing out.
Kitchen remodeling can be a simple process of painting the cabinets and replacing the old fridge with a new one. But it can also involve a complete overhaul of the space – tearing down walls, expanding the room, and installing new fixtures and appliances. Whichever route you take to complete your kitchen upgrade, some great ideas are always welcome. The team at Elite Custom Painting and Remodeling brings you some trendy kitchen upgrade ideas for a beautiful and functional space.
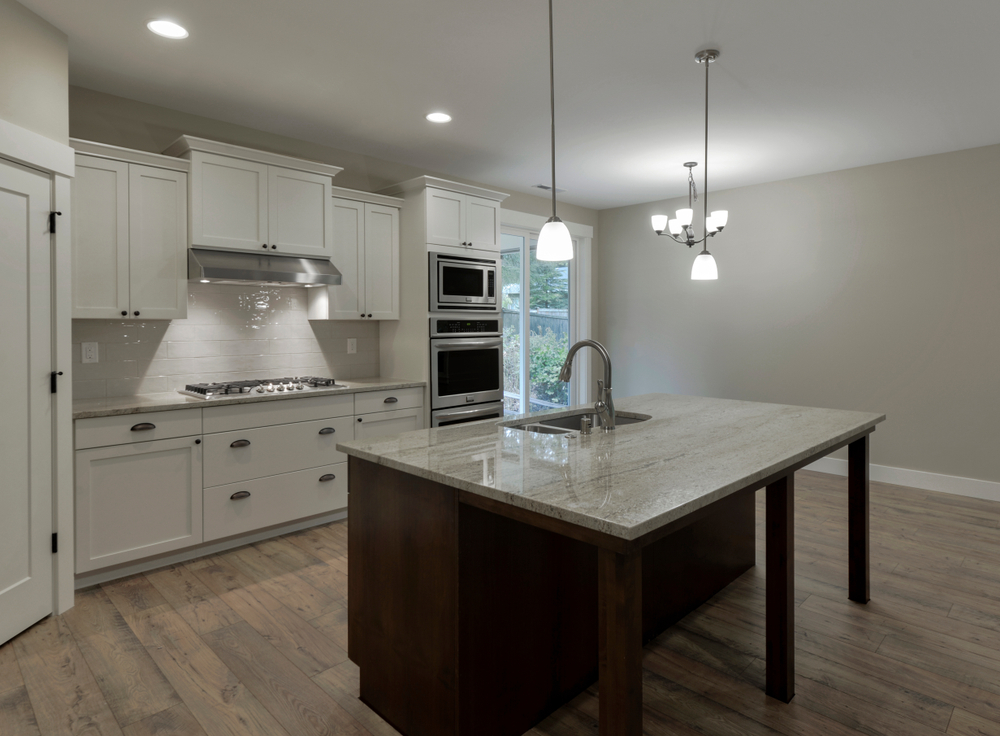
The Open Concept Layout
One of the popular trends in kitchen remodeling is to create an open-concept layout. This involves taking down or partially taking down walls to create a more open and airier feel in the space. You can find creative ways to achieve this look without completely gutting your kitchen. For example, you could install an island in the middle of the room or use a peninsula as a divider between the kitchen and living space.
Antique Wood Element
Wooden themes have always been around, but mostly with living rooms and bedrooms. We’re now seeing many homeowners extend that wooden look into the kitchen with antique wood elements. If you want to stay up to date with current trends, your kitchen remodels ideas should include this hot trend.
Open Shelving
Another top kitchen remodeling idea is to ditch the upper cabinets in favor of open shelving. It helps the kitchen feel more relaxed and airy, which is excellent if you have a small space. Plus, it’s a great way to show off your pretty dishes.
Consider Pattern Play
Patterns are no more just about your living space or bedrooms. Your kitchen remodeling can also include a fun pattern play. You can use it on the floors, walls, or even backsplash. It’s inexpensive to bring some flair to your cooking space that otherwise could be left bland.
Update Your Hardware
While focusing on kitchen remodeling, don’t forget to update your hardware too. Small details can bring about a massive impact. You can opt for a classic look or something more modern. Just make sure it fits in with the rest of your kitchen’s style.
Install a Breakfast Nook
The days of the breakfast bar are gone. Breakfast nooks are the new in-thing. They’re a great way to save space and create a cozy spot for your morning. When going for a kitchen upgrade, you can share some inspiration with your contractor and have them work their magic.
The best way to add some savviness to your cooking space is by adding a pop-up cellar.
Bring In Some Natural Elements
When it comes to design, the inspirations are limitless. But one of the most popular kitchen trends as of late is to bring in some natural elements. This can be anything from plants to stone countertops. It’s a great way to add visual interest to your space and make it feel more connected to the outdoors.
Introduce Smart Technology
Suppose you’re someone who loves to have the latest and greatest gadgets on hand. In that case, a kitchen upgrade is a perfect opportunity to introduce some smart technology. There are all sorts of advanced and cool gadgets on the market that can make your life easier, from hands-free faucets to refrigerators that can order your groceries. You can even get a stove that will turn off if you forget. By integrating some of this technology into your kitchen, you can make it a truly modern space.
Invest in Some Air fryers
Wait, air fryers and kitchen remodel? To be honest, air fryers are all about convenience and saving you time. Especially if you’re looking for a kitchen that will make your life easier, then air fryers are a great addition. These tiny machines can help in kitchen upgrades by looking trendy and making your time leisurely.
Wood Finishes Can Be Great
Apart from antique wood pieces, you can use wood in other ways to give your kitchen an updated look. If you have cabinets that look worse for wear, consider refinishing them with a dark wood stain. This will give your kitchen a transformed new look without having to replace all your cabinetry. To upgrade your kitchen one notch further, consider installing new hardware on your cabinets. This will add a touch of elegance and make your kitchen look even more updated.
A Souped Up Pantry
A kitchen is not complete without a fully stocked pantry. While carrying out your kitchen remodeling, taking care of your pantry should be a top priority. A well-organized pantry will make cooking and meal prep much more effortless. With your contractor’s help, you can install custom shelving and storage solutions to make the most of your space. Make sure to allocate plenty of room for large appliances such as a stand mixer or food processor.
Stow Away Appliances in Drawers
An upgraded kitchen shall not be complete without state-of-the-art appliances. If you want to hide your dishwasher and other small appliances, stow them away in drawers or inside the cabinets. This way, your kitchen will feel more spacious and organized.
Install a Pot Filler
If you are remodeling your kitchen to make it more functional, you should install a pot filler. This is an excellent addition if you cook a lot. With a pot filler, you can quickly fill up pots and pans with water without having to carry heavy dishes every time.
Conclusion:
If you’re in the market for a kitchen remodel, you can trust Elite Custom Painting and Remodeling, serving Falls Church, VA. We have years of experience updating and remodeling kitchens and can help you create a beautiful and functional space that meets your needs. Whether you’re looking for new cabinets, appliances, or countertops, we can make your dreams a reality.
Exploring EIFS For Stucco Home Exteriors!

Key Takeaways:
- Stucco is a durable, long-lasting material that can be tinted to achieve virtually any color scheme.
- EIFS is an easy-to-apply, self-adhesive system that bonds directly to your existing wall surfaces.
- It would be best if you always got multiple quotes from different contractors before getting EIFS.
- The cost of materials for an EIFS installation can vary widely depending on the size of the project and the type of materials used.
A home is more than just the walls and a roof. It’s a reflection of your unique style and personality. So when it comes time to give your home a facelift, you want to choose an exterior finish that will look great and stand the test of time.
For many homeowners, that means choosing stucco. Stucco is a durable, long-lasting material that can be tinted to achieve virtually any color scheme. And thanks to the latest advances in exterior finishes, you can now get the look of stucco without the hassle of traditional application methods.
You can achieve professional results with an advanced product like EIFS (Exterior Insulation and Finish System). EIFS is an easy-to-apply, self-adhesive system that bonds directly to your existing wall surfaces. And because it’s made with lightweight polystyrene foam, EIFS provides superior thermal insulation, helping to keep your home cool in the summer & warm in the winter.
This blog post will explore all the basics you need to know about EIFS for stucco home exteriors!
What Is EIFS, And What Are Its Benefits for Stucco Homes?
Exterior Insulation and Finish System is a type of siding popular in stucco homes.
It is made up of three layers:
- a layer of foam insulation
- a layer of fiberglass mesh
- a topcoat
The foam insulation provides an extra layer of protection against the elements, while the mesh helps to reinforce the structure of the siding. The top coat can be either paint or stucco, depending on the look that you want to achieve.
EIFS is an attractive option for stucco homes because it is low maintenance and easy to install. In addition, EIFS can help improve your home’s energy efficiency by creating an airtight seal that prevents heat from escaping.
How to Install EIFS
EIFS siding is made of a foam core covered with a synthetic stucco finish. If you’re thinking about installing EIFS on your own, here’s what you need to know.
Gather Your Supplies
First, you’ll need to purchase the materials. You’ll need foam boards, adhesives, screws, and mesh tape. Make sure to get the right type of adhesive for your foam boards. Some hardware stores will sell kits that have everything you need.
Cutting the Boards
Next, you’ll need to cut the foam boards to fit your home. You can do this with a saw or a utility knife. Foam boards can be cut easily, so don’t be afraid to experiment until you get the perfect fit.
Start Installing
Once the foam boards are cut, it’s time to install them. Begin by applying the bottom row of foam boards to the house with adhesive. Then, use screws to secure the top row of foam boards. Be sure to countersink the screws so they’re flush with the surface of the foam board. Finally, use mesh tape to cover any seams between the foam boards.
Installing EIFS is not a simple process. If you’re not experienced, leave the installation to a professional. There are many contractors who specialize in EIFS installation and would be more than happy to help you get the job done.
No matter what route you decide to take, installing EIFS is an excellent way to improve the look and feel of your home.
Related: Signs your house structure is compromised.
The Cost of EIFS Installation and Materials
You may be wondering what’s the cost of installing this incredible material! On average, it should cost somewhere between $20 – $35/ sq. ft. This is just a rough estimate.
The cost of materials for an EIFS installation can vary widely depending on the size of the project and the type of materials used. The same is true for labor costs, with some installers charging more than others. So it isn’t easy to give a definitive answer when it comes to the cost of an EIFS installation.
However, if you are looking to get an idea of what the cost might be, consider the following!
- First, the size of the project will have a big impact on the overall cost.
- Second, the type of materials used can also make a difference.
- And finally, the labor costs associated with the installation can also vary significantly.
With all of this in mind, it is important to get quotes from several contractors before making a final decision. By doing so, you can be sure that you are getting the best price for your EIFS installation.
Pros and Cons of Using EIFS On Your Stucco Home
There are several advantages to using EIFS on your stucco home.
- For one, it provides an excellent barrier against air and moisture infiltration.
- It also adds rigidity to the house’s structure and can help reduce energy costs by providing additional insulation.
- Furthermore, EIFS is available in a wide range of colors and textures so that you can create a unique look for your home.
Don’t forget that there are some drawbacks to using this system.
- One is that it can be more expensive than traditional stucco finishes.
- If not installed properly, EIFS can lead to leaks and other problems.
Remember, it is important to consult a professional before deciding whether or not to use this system on your stucco home.
How to Care for Your EIFS-Covered Stucco Home
You love your stucco home. It’s unique, stylish, and low-maintenance. But how should you protect the EIFS coating? Here are a few tips:
- First, don’t power wash your stucco. The high-pressure water can damage the coating and cause cracks. Instead, use a garden hose with a low-pressure nozzle to gently rinse away dirt and debris.
- You must avoid harsh chemicals or abrasive cleaners on your stucco. These can also damage the coating. Instead, use mild soap and water or a specifically designed stucco cleaner.
- Finally, inspect your stucco regularly for any cracks or damage. If you see any problems, contact a professional EIFS contractor to have them repaired. Following these simple tips, you can keep your stucco home looking beautiful for years to come!
Related: How Does the EIFS System Work?
Conclusion
As you can see, there are many benefits to using EIFS for your stucco home. Not only is it low maintenance, but it’s also durable and can withstand the elements. If you’re looking for a beautiful, long-lasting exterior for your home, EIFS is a great option to consider!
Tired of the same old look and need a fresh coat? Whether you want to add curb appeal for selling purposes or just want a change, stucco/EIFS painting with Elite Custom Painting and Remodeling in Vienna is the way to go! We follow all recommended industry practices and use only the best equipment to prep and paint your stucco/EIFS. Our highly skilled painters will take the time to do the job right, ensuring that every detail is accounted for. Contact us today for a free estimate!
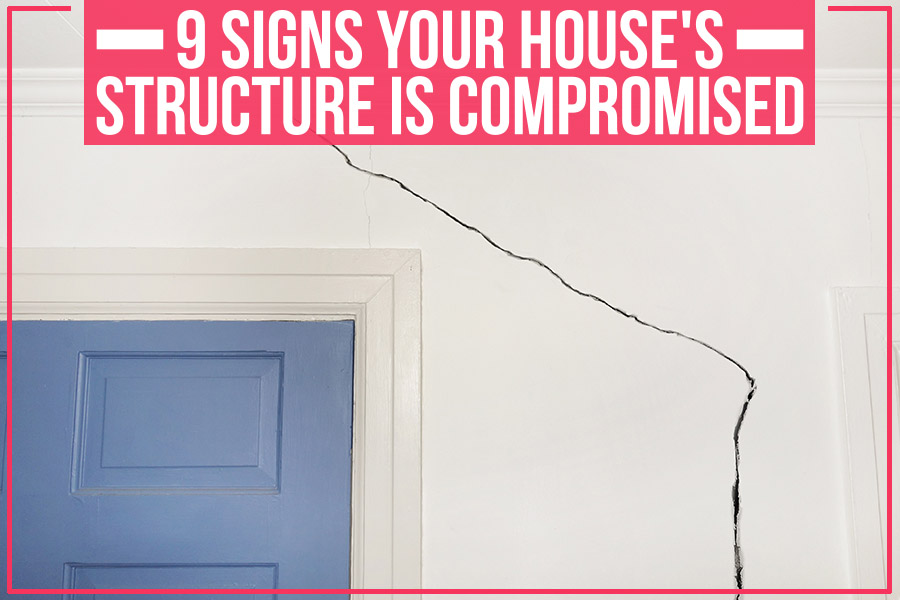
9 Signs Your House’s Structure Is Compromised
Key Takeaways:
- House structure is compromised if there are cracks, sagging, and moisture issues.
- Wood frame rot, mold, drywall damage, or deck rot can also lead to damage.
- Structural damage can decrease the resale value of your home and make it unsafe to live in.
- If you see any of these signs, it’s important to call a professional for an inspection and repairs as soon as possible.
Signs of structural damage should be a major concern whether you are purchasing your first house or seeing something unusual in your current home. Things that initially appear to be minor issues can gradually become major problems. Homeowners must recognize the signs of structural degradation to treat the core problem before it gets expensive or irreparable. We’ll cover the signs that your house structure is being compromised in this blog post and how to spot them.
Sign 01: Cracks In House Foundation
One of your home’s most important structural components is the foundation. The foundation supports your home’s weight, so any cracks or instability can be a serious issue. Small cracks can grow over time, compromising your house structure. A major problem is if large fractures are above entrances in a step pattern or with a sagging ceiling. Many factors might cause problems in the foundation of your houses, such as water damage and tree roots.
Sign 02: House Sagging
Sagging is one of the most obvious indications that the structural integrity of your home is at risk. This may show up in several different ways, such as windows that aren’t level or doors that don’t match their frames. Three things usually cause house sagging:
- The first is poor installation or a lack of support for the structure.
- The second is damage to the foundation, often caused by water or shifting soil.
- The third is leaks or excessive moisture caused by severe rot in the substrate or saggy roof results. An expert examination is required for this issue.
Sign 03: Poor waterproofing in wet areas
Poor waterproofing of moist areas is among the most frequent causes of structural issues. Waterproofing is a method that stops water from penetrating your home’s structure. Having your washroom or laundry checked out by an expert as early as you suspect a leak is crucial. Long-term water exposure can cause structural damage, mold, and mildew.
Sign 04: Bulging Of Drywall
Interior curved or bulging drywalls indicate a weak or insufficient internal support system. Walls that are constructed too thin to support the weight of ceilings or upper levels might start to warp and bulge over time as the house’s frame begins to settle. These are telltale signs that something is seriously wrong with your home’s structure and requires an immediate investigation. At best, the property should be evacuated until it has been sounded & stabilized.
Sign 05: Sticking doors and windows of your house
Doors and windows that stick are frequently caused by frameshifting. Sticking windows and doors can cause many issues if they are not fixed. Your home may become drafty if your doors and windows don’t fit snugly. Because of this, it could be difficult to keep your house cool in the summer and warm in the winter. Similar to how it can damage the surrounding area more if water seeps through cracks in doors and windows.
Sign 06: Damp subfloor
The part of your house below the ground level is called the subfloor. It may indicate structural issues if this area starts to get damp. There are a variety of things that might lead to subfloor moisture, including poor drainage and cracks in the house foundation. It’s important to have your house subfloor assessed by an expert if you detect that it’s damp. Dampness in the subfloor, if ignored, can result in moisture-related issues and compromise your house’s structure.
Sign 07: Deck Rot
When it comes to your deck, moisture is the enemy since it fosters the growth of fungus, mold, and mildew. You can be in the early stages of dry rot if your deck has been exposed to condensation or any other constant water source. Under these circumstances, the wood-digesting fungus can quickly penetrate and start to jeopardize the integrity and safety of your deck. When your deck starts to rot, it could signal frame damage, ultimately leading to a dangerous and expensive collapse.
Sign 08: Cracks in The Chimney
Cracks in your chimney’s bricks and mortar may most easily be seen outside your house. Cracks in your chimney, like those in other external walls, warn that your house is shifting and putting too much strain on the bricks.
Sign 09: Wall Rotation
Wall rotation is not particularly frequent, yet it is still possible. In general, it indicates that the wall has moved from its original position, which causes walls to fracture and seriously harm your home.
If you suspect your property may have any of the issues mentioned above, you should speak with a structural engineer right once
It’s crucial to address worries that there could be a future structural issue to keep everyone in your home safe. Your home may suffer from certain structural problems that, at worst, might even lead to its collapse. Brushing the structural issue under the rug will make your pocketbook much worse.
What Is The Estimated Cost Of Structural Damage?
The cost of structural issues can be very expensive. It can be between $5000 and $10000 for small repairs and upwards of $100000 for larger repairs. Depending on the severity, damage to your house’s structure can make it uninhabitable.
How Can Structural Damage Affect The Value Of Your House?
Structural issues can have a significant effect on the value of your home. Suppose you are planning to sell your home. In that case, it is important to get any structural damage repaired before placing your house on the real estate market. A professional home inspector will be able to:
- Thoroughly inspect every nook and cranny of your home
- Determine if there are any immediate dangers
- Create a report with their findings and recommendations
- Help you find the right professionals to make the necessary repairs.
At Elite Custom Painting and Remodeling, serving Fairfax, we recognize the value of professionalism, quality, and service. We aim to infuse beauty and elegance into your daily routine without the anxiety or headache that typically accompanies home remodeling projects. Please do get in touch with us for more details on our services.

Commercial remodeling can get chaotic. If you’re not prepared, your office can quickly become a disorganized mess that can put your business on hold for weeks or even months. But with thorough planning and forethought, you can keep the remodeling process running smoothly and minimize any downtime.
Here are seven tips on how to keep your business running smoothly during a commercial remodeling project.
1. Have a Well Thought-Out Plan and Timeline for the Remodel
Map out precisely what you want to accomplish with the remodel and a realistic timeline for completing the work. This will give you a head start on the project and ensure everyone is on the same page.
2. Communicate with Your Employees and Customers
These are the parties who will be most affected by the remodel, so keeping them in the loop is essential. Let them know what to expect regarding noise, dust, and disruptions and how long the project is expected to take.
3. Schedule Remodeling Work During Off-Peak Hours
You don’t want to be without power or heat in the middle of a busy workday, so try to schedule your remodeling work for after-hours or on weekends. You can also stagger your employees’ hours so that some work while others are on break.
4. Keep an Eye on the Budget
It’s easy to get caught up in the excitement of commercial remodeling and go over budget. A firm understanding of your financial limitations can help you avoid costly surprises and stay on track.
Also, set aside some funds for unexpected repairs or last-minute changes. Preparing for the unexpected can keep your business running smoothly during a commercial remodel.
5. Make Sure All Equipment and Materials Are Properly Labeled and Stored
It’s a pain to search for things when you’re in the middle of a remodel. Plus, it gives the wrong impression if you have equipment and materials strewn about. Keep your work area organized and adequately label everything to make it easy to find what you need.
6. Have a Contingency Plan
No matter how careful you are or how well you plan, there is always the potential for something to go wrong. In such times, a contingency plan could be the key to success. This could involve anything from having a backup supplier for materials to renting a temporary space to accommodate your business needs during the remodel.
7. Work with a Professional Remodeling Contractor
Commercial remodeling can be a big undertaking. You want to ensure the job is done right, so it’s worth working with a reliable remodeling contractor. They will have everything you need to finish the job quickly and efficiently.
Elite Custom Painting and Remodeling offers top-notch remodeling services in Virginia. We start with a one-on-one consultation to assess your needs, understand your vision, and develop a plan that fits your budget. We handle everything – from design to permits to construction, so you can focus on running your business.
If you’re ready to start your commercial remodel, contact Elite Custom Painting and Remodeling today!
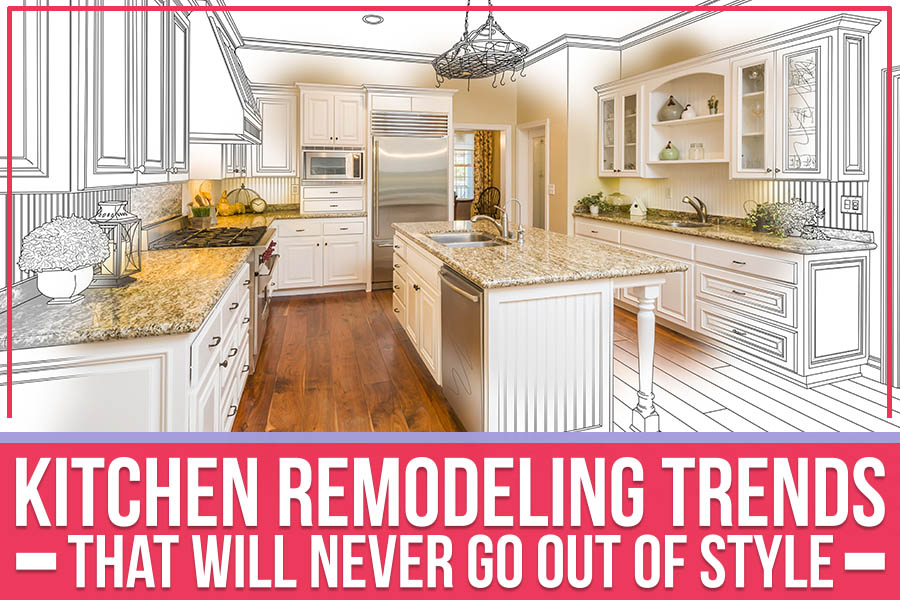
Do you want to try out a new kitchen design you’ve seen on the internet? Before jumping on the bandwagon, remember that the next six months will likely bring a new trend. By then, you may regret your avocado-green refrigerator or your 80s-inspired wallpaper.
Of course, not all kitchen trends are short-lived. Some designs have transcended time and remain classic no matter the year. Consider incorporating one of these evergreen trends if you plan a small kitchen remodel or a full-blown kitchen renovation.
Create More Workspace:
The 2022 kitchen trends focus on creating more space in small kitchens. If your kitchen feels cramped and cluttered, it’s time to make a change. Adding an island or a peninsula can give you extra workspace. If that’s not an option, try installing floating shelves or open shelving. Open shelves are ideal for small kitchens since they don’t take up any precious floor space.
These small changes can hugely impact your kitchen’s looks and feels.
Update the Backsplash:
We all deal with the traumatic oil splashes and pasta sauce stains on our backsplashes. But that doesn’t mean we have to live with them forever. Adding a new backsplash is a quick and easy way to update the look of your kitchen. According to the 2022 kitchen trends, neutral color schemes with straight and simple lines are in. So, if your backsplash looks a little dated, consider replacing it with something more modern.
Install New Cabinet Hardware for a Fresh Look:
Kitchen cabinet trends change with seasons. There’s always something new, from all-white cabinets to two-toned cabinets. But if you’re not yet ready to try a fresher color palette, go lowkey and switch out your cabinet knobs and pulls for something new. It is one of the easiest kitchen cabinet trends to try.
Paint the Walls in a Bright Color for Personality and Contrast:
Colors have a psychological effect on people. They can make you feel happy, relaxed, or even hungry! When painting your kitchen walls, go with a color that you love that will make the space feel lively. For a small kitchen remodel, try a bright color like yellow or subtle grays to add personality and contrast. But if you’re following the 2022 kitchen trends, green is the way to go!
Update Your Faucets:
Brass and copper are making a comeback in kitchen design; if you’re looking for a small change that will make a significant impact, update your faucets! These kitchen trends are not only stylish, but they’re also practical. Brass is easy to clean and enhances your kitchen’s look. Plus, now there are various styles like touchless faucets, wheel knobs, and pull-down levers that will go well with your new kitchen design.
Conclusion:
Finalizing a new kitchen design can be tricky. There’s much to consider, like the layout, color scheme, and appliances. But a professional kitchen remodeler can pull it together for you and create a stylish and functional kitchen.
With these 2022 kitchen trends in mind, get in touch with Elite Custom Painting and Remodeling, serving Fairfax Station. Whether you’re interested in a small kitchen remodel project or want to try one of the leading kitchen cabinet trends, our experts can handle it all.
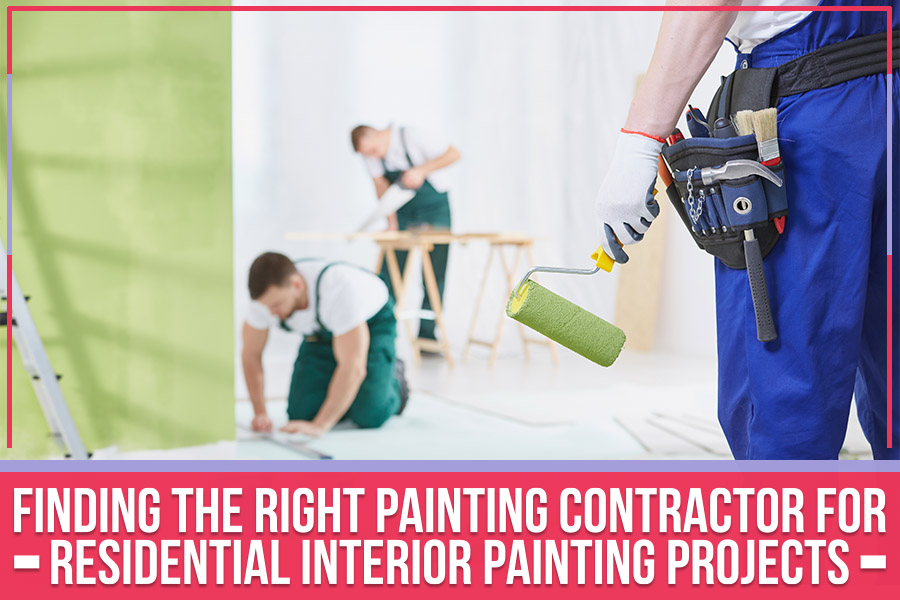
Between work, family commitments, and other obligations, who has the bandwidth to paint a room? That’s where hiring a professional painting contractor comes in handy. But with so many painters to choose from, how do you know which one is right for your project? Continue reading to discover tips to find the ideal painter for your residential interior painting project.
1. Look for References –
Start your painting contractor search by asking friends, family, and neighbors for references. Suppose a close friend or relative hired a painting contractor for residential interior painting. In that case, they can give you first-hand insight into the quality of the work and customer service they received.
2. Check Online Reviews –
Additionally, you should also check online reviews. A quick Google search helps disclose a wealth of information about local painters, including customer reviews and ratings. Online reviews on popular ratings and social media networks are an excellent way to get an unbiased overview of a company’s work.
3. Meet Prospective Painters in Person –
Once you’ve narrowed your options, meeting the painters in person is crucial. An in-person meeting lets you ask more detailed questions about a contractor’s experience and services. You can also gauge the work ethic of a contractor & their team just by their professional demeanor.
4. Check Their Portfolio –
You can request to see a portfolio of the contractor’s previous work during the meeting, giving you a better reading of their style and abilities. A portfolio helps clarify the contractor’s permit success rate, their expertise & success in local projects.
5. Get Written Estimates –
Finally, get written estimates from each of the painters you’re considering. You can use the written estimates to compare apples with apples regarding price. When receiving written estimates, ensure each painter includes the same services in their estimate.
6. Check for License & Insurance –
When you’re meeting with potential painters, be sure to ask if they’re licensed and insured. This is important for two reasons. First, you want to make sure that the person you’re hiring is qualified to do the job. Second, you need to ensure you’re covered if something goes wrong during the job.
7. Don’t Fall for the Lowest Bid –
When hiring a painter, the adage “you get what you pay for” applies. While choosing the cheapest option is tempting, prioritizing lower prices could cost you in the long run. If a painter does a poor job, you may have to spend even more money to fix the issue.
You need to choose a painter and not just go with the first person who gives you a quote.
Who’s the Right Choice? –
If you’re looking for a painting contractor who takes the time to understand your specific needs and deliver beautiful results, look no further than Elite Custom Painting and Remodeling, serving Arlington.
We understand that painting your home’s interior is a big decision, which is why we use the latest products and creative techniques to deliver beautiful results.
Get a free estimate for residential interior painting from our team and discover how a fresh paint coat can transform your place!
Connect with us


Categories
Imagine Your House – But More Beautiful, Functional, & Valuable.
Virginia's Most Trusted Home Remodeling & Painting Company Can Make it Happen!
Request a Free EstimateQuick Links
License#
2705075516 PTC
Our Services
Information
- 2800 Eisenhower Avenue, Ste 220,
Alexandria VA 22314
| Hours | |
|---|---|
| Monday | 7:00AM - 6:00PM |
| Tuesday | 7:00AM - 6:00PM |
| Wednesday | 7:00AM - 6:00PM |
| Thursday | 7:00AM - 6:00PM |
| Friday | 7:00AM - 6:00PM |
| Saturday | 8:00AM - 3:00PM |
| Sunday | Closed |